Showing posts with label toddler. Show all posts

January 6, 2014

Organization 101

Last year brought us a New Year New Home. We focused on each room, fun products and features, and created some awesome DIY projects along the way.

So, what's in store for this year??

Organization, people. Organization.

Each month will feature a new printable that you can click and save, print at home and use for your own home organization. Everything from emergency contact lists to gift checklists to camp planners for the summer! Get ready to get organized!

This month, it's all about getting the little ones to help out around the house. A chore chart, my friends!


Gentle ways for toddlers to help, express themselves and earn stamps for rewards or certain items that they might really really want.

Download here for free!

Tip: Give stamps sparingly! Offer other treats and rewards so that it takes a little longer for them to work toward the big items!

Coming next month is an emergency contact number printable - something that should be on every fridge for every babysitter!

Photobucket

May 15, 2013

A Pirates Life for Me

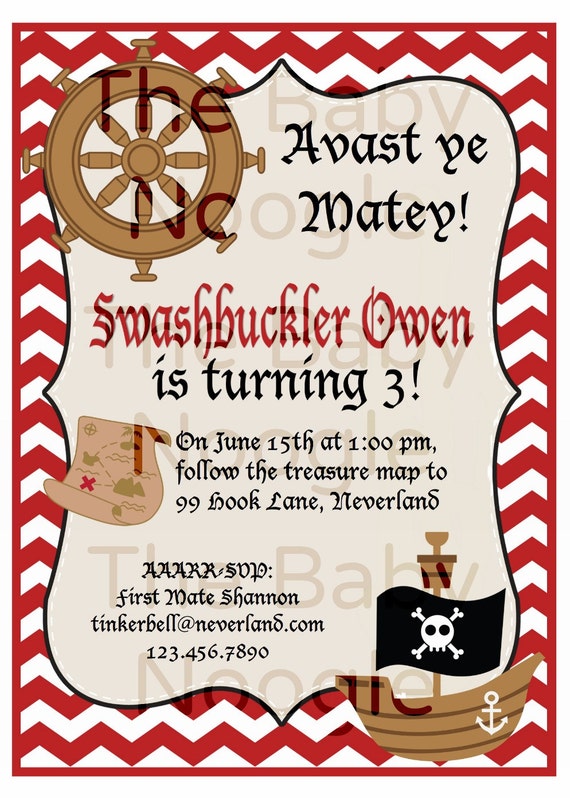
It seems like forever ago that we decided on the theme for our toddlers birthday party. Over the next couple of weeks, I will be revealing elements of the party and talking about how to set up some fun activities for your little swashbucklers!

Today is all about the invitation. Immediately, I went to my super talented graphic designer bloggy BFF Shannon of Baby Shmizz. She started a shop on Etsy, The Baby Noogle, and it is absolutely amazing the thing that she can do with digital design!

How amazing is that?! I threw out piratey term like Swashbuckler, first mate, avast and matey...then she took care of the rest!

Stay tuned! I'll be showing cake inspiration, food table labels and some activities over the next couple of weeks!

Photobucket

July 16, 2012

Let Their Confidence Shine

Setting your kiddos up for success at school {and at home} is something that is oh so important for our toddler to learn. From doing crafts with Mama and discovering our artsy side, to playing ball with Daddy and using up some physical energy...whatever the case, it always is reinforced with high-fives and lots of love.

One thing that we've learned, is to stay consistent and positive with him. We started Owen (now 2years old, but really this is so important at every age!) at The Little Gym in January, and we have learned oh-so-much.

First and foremost, lots of praise can go a very long way. We are always praising Owen with lots of clapping, high-fives (or five-fives as he calls them) and great big hugs. We definitely have found that when he gets a high-five, he's more inclined to exhibit that positive, confident and healthy habit over and over again!


Secondly, thanking them for exhibiting that positive behavior. The teachers at The Little Gym always encourage us to thank our little ones for coming back to the red mat...and boy oh boy, does it ever work!! Owen seems to run to me for a great big hug and I always thank him for coming back to the big red mat, and he gives me the biggest smiles! Now, 6 months into the program, he rarely strays.


Also, encouraging them to be who they are and embracing them when they might not be cooperating is something that is really important in building their confidence. Recently, Owen's had some issues with the big beam....it's high, intimidating and climbing those stairs can be a tricky thing. But...with gentle encouragement, and not pushing him until he's comfortable....he's right up there with the bigger kiddo's now, and totally dominating it!


How will this all translate to pre-school? Well...he knows limits and is respectful of other peoples limits. He knows that when he's not comfortable with something, to ask for help, and is confident in seeking a grown up to get that assistance. He knows to keep trying new things, even if they're scary...which means interacting with new kiddos, saying new words, and meeting new teachers along  the way.

Knowing that he's confident, and that we instilled that confidence in him with gentle encouragement, lots of positive praise, and modelling that positive behaviour is kind of like a little pat on the back for a parenting job well done!

As a member of Clever Girls Collective, I was selected to participate in the Healthy Habits program sponsored by Kimberly-Clark and Colgate-Palmolive. The content and opinions expressed here are all my own. #healthyhabits #cgc

June 28, 2012

SWH4T$: Spikey Sponge Balls


Summer is here!  And along with it comes the task of finding interesting ways to keep your kids entertained {and cool in the heat} during these deliciously long hot days.

Jack's birthday party is coming up in a few weeks, and one thing I learned from last year, is that I need activities for the kids that are either in the shade, or that will keep them cool.  Especially since this year the kiddos are a year older and mobile on 2 limbs instead of 4 :)

A great way to keep your kids cool and inspire some outdoor physical activity fun is Spikey Sponge Balls!

Each Ball requires 2 sponges, I bought 12 sponges for $4.50.
Make sure you get the plain sponges without the scrubby side!
You can use ribbon, embroidery floss or fishing line as your tie-element.

Cut each sponge in half lengthwise...

...and then cut those halves in half again lengthwise.

Stack them up, alternating colors (8 total sponge sticks for each ball)

Cut a piece of your tie-element and tie it around the middle of the stack, pulling it as tight as you possibly can.  Cut off loose ends.

These balls are great because you can soak them in water, the kids can throw them around, squeeze them on each other - and its good, clean, cold & wet fun!

The best part is that if you are a neat freak mom like me, you can put them in a mesh bag and run them through the dishwasher to clean them :)

For Jack's party I plan on filling his water table and putting the Spikey Sponge Balls in there, along with some cups and measuring spoons and letting the kids go to town!

You can find the original tutorial HERE.


Photobucket

June 18, 2012

Party Wrap Up

Whew! What a whirlwind of a weekend!

Party set up started at around 10am on Saturday and I couldn't be happier about the results!


Little Bear, you are one very loved little dude!!!

And yes...to answer your next question, I have started planning his 3rd birthday...it's a circus, turning three!! ;)

June 15, 2012

Mama Moments...on a Friday?

Going to get a little sentimental today.

Tomorrow, my son turns 2.

Two

T-W-O

Deux

No matter which way you put it, it's emotional for mama.

I remember it all so clearly...the water breaking, the epidural, the 10hours of LOST that we watched...the aftermath.

I remember your Daddy walking in with you in his arms, and the biggest smile on his face {anyone crying yet, because I sure am as I write this!}. I remember snuggling you for the very very first time, and how in that one moment, I knew that I would be mush everytime you came to me for a snuggle from that day forward.

Tomorrow, you're two, little Bear.

My sweet sweet Bear...

Oh, how time flies.

I want to never forget how you say peas, tank-too, and welcome. I want to never forget how you say wuv-you and blow kisses to everyone, even from your carseat to people in the next car when we're stuck in traffic.


I will never ever ever forget the kisses you give first thing in the morning, or how you still like to have  All My Loving sung to you when you`re upset.

Happy birthday, Bear.

June 10, 2012

Sponsor Love: Epicure Selections with Amanda


What’s a summer BBQ without the snacks??

As you all know, I am a big fan of healthy alternatives and making as many things at home for my toddler as possible. 

Enter the Epicure Chipster and Ceramic Slicer 


Use the slicer to slice up your veggies…parsnips, carrots, sweet potatoes…try it with hard fruits too like apples and pears! Then, pop the slices into the Chipster and put in the microwave for 3-4 minutes and…

Healthy alternative chips! Right at home, and without the added oils! 

Add any of the wide variety of Epicure seasonings before popping the slices in the microwave, and you have new chips all the time! 

Having the girls over for a girls night? Forget the veggie tray, and offer up a tray of homemade chips, that won’t go to your hips!

May 24, 2012

SWH4T$: Strawberry Lentil Cookies

As a busy mom, with a somewhat picky toddler, I need easy and quick ways to ensure that he's getting the protein and nutrients that he needs to be the ever-ready bunny that he is.

I knew that I had a bag of lentils in the cupboard, so I cooked up a batch (I think 1/2 a cup of dry lentils...wowzah do they make alot!).

Now...if you haven't cooked with lentils before...they're not the most appetizing in colour, smell of really flavour. In soup? sure. Alone...kinda gross.

Then I had a thought...what if I mixed them with fruit, and pureed them down into a sauce? Would he eat them then?

You betcha...when they were made into Strawberry Lentil Oatmeal Cookies! The best part: thay just taste like strawberry oatmeal cookies! You can't even tell that the lentils are in there! Sneaky...and smart!

1 tsp. baking powder
   1/4 tsp. salt
  1/2 c. butter
  1/2 c. sugar
  2 egg whites
  2 c. rolled oats (I had large flake on hand, so that's what I used)
  2 c. all purpose flour
  1 c. strawberry lentil puree
 

Preheat oven to 375 degrees. Mix dry ingredients, then add and mix the wet ingredients. If you have a cookie scoop, I recommend using it so that your cookies turn out evenly and lovely.

Bake for 11mins.

I found that this made a decent amount of cookies, about 5 dozen so I wrapped them in plastic wrap and popped them in the freezer so I could take them out and have {healthy} cookies on hand whenever needed.

Enjoy!

May 17, 2012

SWH4T$: Toddler Fashion


I know I've talked about it before, but seriously, consignment shopping for kids is like the best thing ever. We all know how it works, kids grow out of stuff faster than you can wash them for the 2nd time.  Therefore, the abundance of gently used kids clothing out there is downright crazy.

I've been to a few different kids consignment stores, but I definitely have my favorite.  Most of these stores are individually owned franchises, therefore the quality of the clothing will vary.  You need to find a store where the owner and employees care about quality and not quantity of clothing.  

The store that I go to (BFF T told me about it, I can't take all the credit) only stocks brand names.  Gymboree, Chaps, Polo, Gap, Children's Place, Nike, Disney, Carters, etc.  Another store that I've been to will sell Target brand (Circo) for like $3/each.  Um, I can get it brand new at Target for cheaper than that so no thank you!  Do your market research owner-lady!  

Most of the time I am able to get a few items NWT (new with tags) at my store.  A lot of times they will have 30% or 50% off sales and fill-a-bag sales.  I go every season and get Jack some extra clothes for daycare, and I usually end up finding a few every-day things as well.  

Here is my latest haul:
1: Talbot's Kids polo shirt, Gap madras shorts
2: Nike Red Sox jersey & mesh short set
3: Nike T-shirt (NWT), Nike mesh shorts

1: Chaps khakis
2: Gymboree t-shirt
3: Gap khakis
4: sun hat
5: Gap t-shirt (NWT)
6: Gymboree jeans
7: Polo jeans
8: Black Dog hoodie (NWT)

Also, not pictured: Fisher Price Zoo Talkers Animal Sounds Zoo, $14.99 (NWT!!!)

So, how much did I pay for all of this?  $82.

Pretty good, considering the Zoo Talkers, Gap khakis & Gap t-shirt at full price would have been ~$82 alone.  

And that Talbot's polo and madras shorts might be my new favorite outfit for Jack 

May 12, 2012

Special Post: Mother's Day Crafting with Shizz


So its the day before Mother's Day, and did you get anything for Grandma?  No?

Well, here I am to save your day :)

This super easy craft is cute, quick (30 minutes tops) and definitely something any grandmother/mother/aunt/sister/friend would love!


Supplies:
small flower pot
hole punch
craft knife
scissors
colored cardstock
green pipecleaners
small block of floral foam
self-healing cutting mat

1 more supply item:
Toddler for tracing :)

Cut our your hand template.
I labeled mine with his age, because I plan on using it again in the near future.

Pick out your colors of cardstock, trace out the number of hand "flowers" you want.

Using your craft knife on your self-healing mat, cut out your flowers.  Make sure to cut ever so slightly inside your traced line, so that you don't have a line that shows up on the flowers.

Next (not pictured) punch holes in the bottom of your flowers, about 1/4 inch from the bottom of the flower.
Then, fold a pipecleaner in half.  Insert the folded end through the hole in the flower, and fold down the tip about 1/2 inch and pinch flat.  This allows your flower to stand straight, and not flop over.

Now twist the ends of your pipecleaner together to make it more sturdy.

Using a bread knife (don't worry Mizzle, I used the cheap one), cut a small cube of flower foam that will squish down in your flower pot.

Then, using scissors to first poke holes in the foam, insert your flower stems and arrange to your liking.
I added a little bit of brown shredded paper "dirt" in the bottom, which also helped to make the flowers stand better.
Now give it to Grandma!

This is a super easy craft that can be used for almost any holiday.  Birthdays, Easter, Mother's Day, Teacher Appreciation (use a handprint from each child in the class), Grandparent's Day, etc.

Enjoy, Happy Crafting!


April 19, 2012

SWH4T$: Rainbow Rice

Rainbow Rice
by: Shizz


I'm sure you've all seen this floating around Pinterest, Rainbow Rice to put in a sensory bin for toddlers to play with. I've been wanting to make this for a while, and Monday was the perfect day since the weather here was 85 degrees and sunny (yup, its still April).


I used this recipe as my guideline :)


I tried to break down the cost by cup of rice, but it wasn't really working, so here is what I paid for everything today (I have leftovers).


1 10 lb bag of white rice: $5.49 (I only used about 1/3 of the bag, I made 12 cups of rice total)

bottle of rubbing alcohol: $1.09

Ziploc bags (sandwich size): $1.00 for 15 (Dollar Store!)

Food coloring: $2.50 for 4 bottles

Plastic container for storage: $1.00 (Dollar Store!)


So that's less than $12 for a fun activity that I could probably make about 8-10 batches from that one bag of rice. Not bad at all!


Step 1: Gather your supplies:


Ingredients listed above,


Wax paper for drying


Disposable gloves (if you hate dye on your hands like I do)


Step 2:


Bag up your rice: 1 cup to a bag


Step 3: Add color


1 T rubbing alcohol + 10-12 drops food coloring


First batch I mixed them in these little bowls, 2nd batch I added


the alcohol and food coloring directly into the bag (much easier)


Step 4:


Squish Squish Squish the bag till all the rice is colored.


Make double sure that your bag is sealed.


Trust me on that one...


Step 5: Dry


Spread out on wax paper in the sun and let dry


I think it took about 30 minutes to dry


Step 6:


PLAY! Dump into a bin, sand/water table, cookie sheet, large bowl,


basically any large container. Add a few utensils, cups or spoons,


and let your toddler go to town!


Jack loved it :) He played with it for about an hour :)


I was worried about the dye coming off on his hands, and I'm


happy to report that there was not one speck of dye on his hands :)

Related Posts Plugin for WordPress, Blogger...
Blogging tips