Showing posts with label wholesome. Show all posts

July 19, 2012

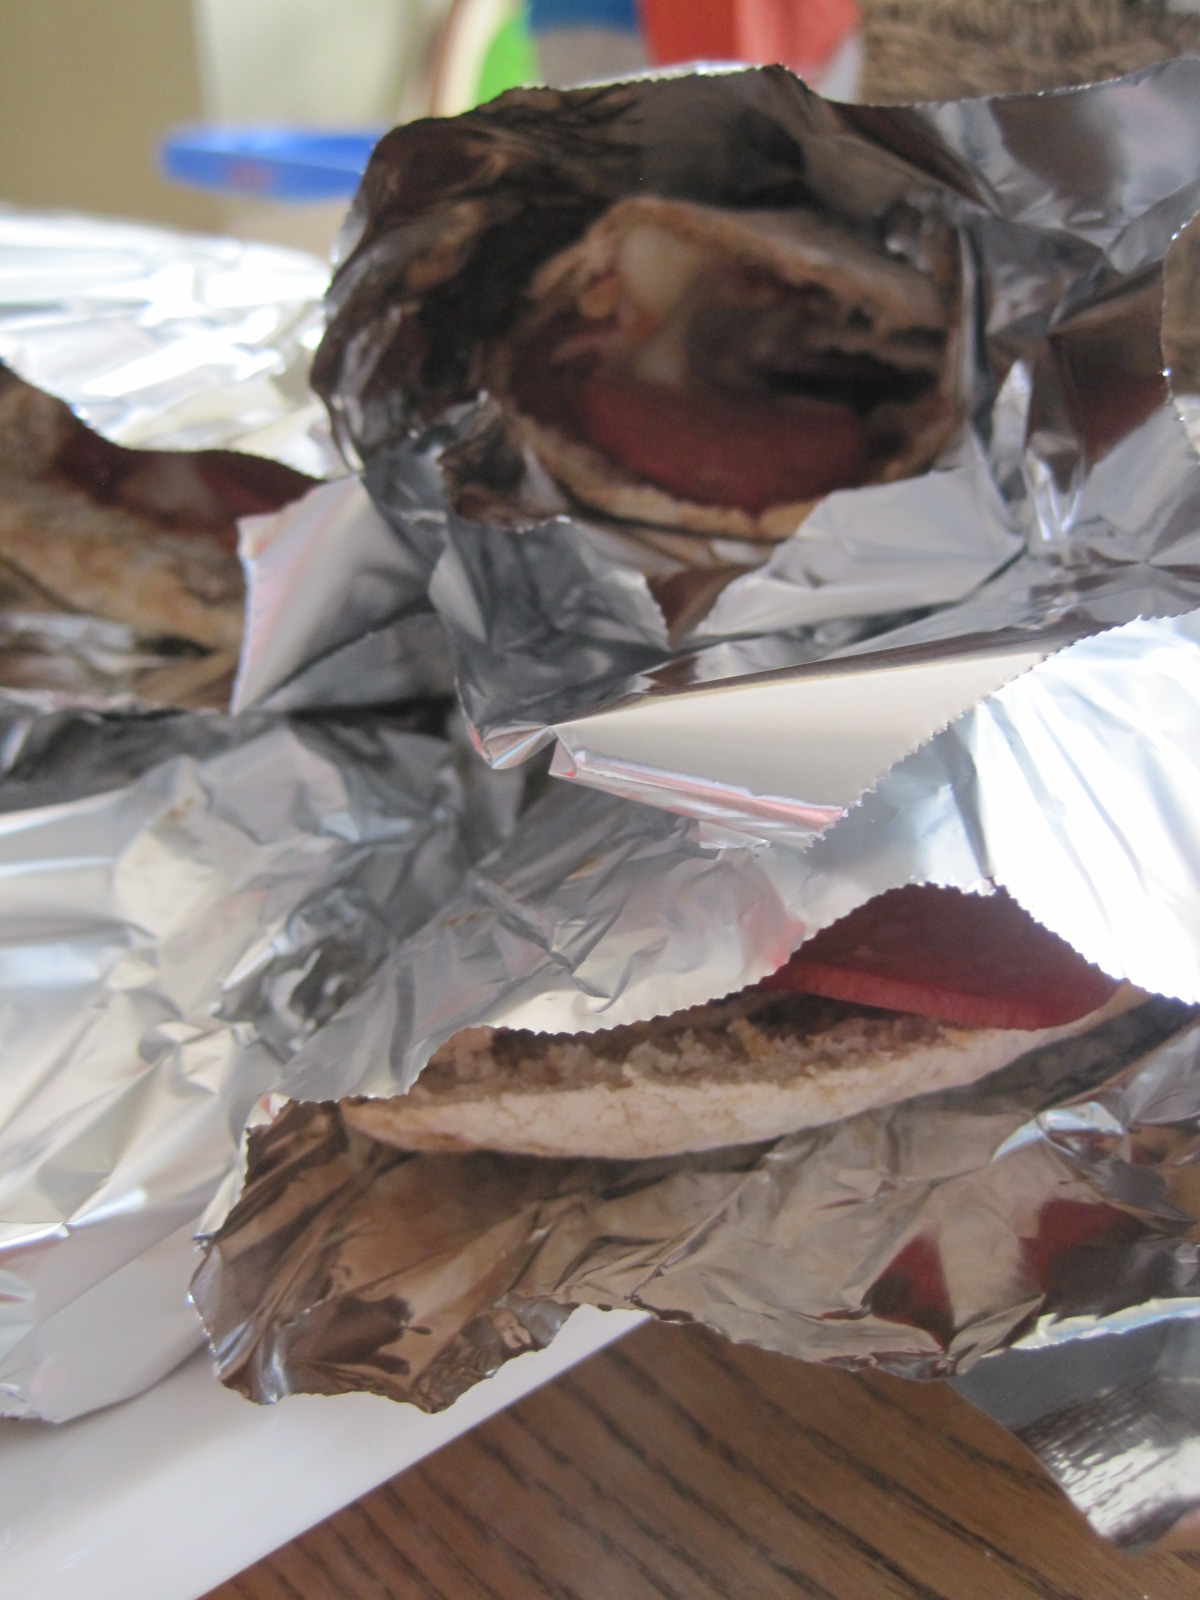
SWH4T$: Pizza Cones on the BBQ

I made these for the campout bithday party that we had last month, and they went over insanely well with the guests. Little did they know...

They took me all of 4 ingredients to make
Took me about 5 minutes to make a dozen of them
They were healthy {shhhh!}

Ingredients: Whole Wheat/Multigrain pita, pepperoni, extra veggie pasta sauce, skim milk mozza cheese {ignore the Iced Cap in the background!}


Step 1: cut the pita in half to make your shell pliable

Step 2: layer sauce, cheese, pepperoni (or other toppings if you'd like)

Step 3: roll into a cone shape

Step 4: roll with tinfoil


Step 5: BBQ just until melty and crispy

Step 6: devour!

They were so insanely good, and the shells were full of flax seed, multigrains and other seeds...the guests were none the wiser! I may even try dessert ones with pita's that have raisens in them...using peanut butter as the "sauce", and sliced banana!

YUM!

March 15, 2012

SWH4T$: Energy Bites

Welcome back to SWH4T$ - a blog hop for money {and time} saving mama bloggers!

We just have three very simple guidelines!

1.) Follow your hostesses at Baby Shmizz and Sweet Stella's via GFC

2.) Link up a specific post that relates to money and time, your job, your business, couponing, anything that shows how you "work hard for your money".


3.) Post our button on your post

Have fun linking and finding new blogs to read!

SWH4T


Energy Bites

I saw these a few weeks ago on Pinterest, and since I really love to make our own treats and ensure that we're eating wholesome goodies, decided to whip up my own version!

Ingredients:
  • 1 1/2 cup (dry) oatmeal (I used old-fashioned oats)
  • 1 cup chopped peanuts
  • 1/2 cup chocolate chips
  • 1/2 cup peanut butter
  • 1/3 cup honey
  • 1 tsp. vanilla

It couldn't be easier to make these energy bites! Literally put everything in a bowl, mix it really well, and then chill for 30 minutes. Roll into balls. I rolled these ones about 1", but definitely could have gone bigger given that my Hubs and kiddo were gobbling them up two or three at a time.

Then put into a plastic container with lid (rubbermaid...whatever), and use wax paper between the layers so that the bites don't stick together. Toss them in the fridge for about 30mins

Makes about 20-25, depending on size

Easy peasy, and the toddler LOVES them!

Do you have an easy, money saving tip to share this week?? Link up with us!


March 1, 2012

SWH4T$: Easy Toddler Breakfast

Happy Thursday, mamas!! Last week I discovered a recipe that will please even the finickiest of eaters...and I'm SO excited to share it with you today!

It's so easy to link up, here's how:

1.) Follow your hostesses at Baby Shmizz and Sweet Stella's via GFC

2.) Link up a specific post that relates to money and time, your job, your business, couponing, anything that shows how you "work hard for your money".


3.) Post our button on your post

Have fun linking and finding new blogs to read!


SWH4T


Easy Toddler Breakfast

Today's post isn't so much about saving money and time (though this is a super frugal and fast breakfast to make any day of the week) as it is about saving your sanity.

Like most other 20month olds, my son has become a veggie-free-zone. Put steamed or roasted veggies on his tray and he looks at you like you have three heads.

Put berries, carrots or bananas in pancakes, and he's your man! He'll gobble it up! Well...until recently when even that form of trickery stopped working.

Then I found this recipe on Pinterest...and man oh man!


What you need:
1/4 cup oatmeal (recipe calls for instant oats, but I used rolled oats)
1 egg
a small handful of whatever fruit you'd like to add in...or veggies! That'd work too! I used blackberries and raspberries

Mix everything together in a microwave safe coffee mug, then microwave on medium high for 1 minute. If it's not firm enough and the egg is still runny, put it back in for 30 seconds.

Chop into big chunks and serve warm!

Saving time, money and your sanity...one toddler breakfast at a time!


Link up with us!


February 2, 2012

SWH4T$: Time Saver Pancakes

Happy Thursday everyone, and welcome back to She Works Hard For the Money - a bloghop for hard working mamas who do everything they can to save time and money!

The rules are simple...

1.) Follow your hostesses at Baby Shmizz and Sweet Stella's via GFC

2.) Link up a specific post that relates to money and time, your job, your business, couponing, anything that shows how you "work hard for your money".

3.) Post our button on your post


Have fun linking and finding new blogs to read!


Time Saver Pancakes

I find myself in a bit of a rut sometimes. Between my crafty, artsy business...another new business that I'll be launching with a great Mama friend of mine...my Husband having his own business...plus our son's activities...I'm stretched pretty thin.

Because of that, I try to plan at least one meal ahead of time to save myself time, frustration and allow myself to enjoy a meal with my son throughout the day. Breakfast seems to be the easiest, and I've developed a recipe for success!

I make one or two full batches of pancakes at the beginning of a week, and whatever we don't eat that day goes into a Ziploc and into the freezer. Then, I can pull out pancakes as needed, pop them into the toaster and know that my son is getting a super wholesome breakfast.

Here are two varieties, that just so happen to help with fussy eaters who don't get alot of fruits or veggies.

Pancakes...two ways


Whole Wheat Oatmeal Mixed Berry


Whole Wheat Oatmeal Asparagus (yes..you read that right!)

Preheat griddle or frying pan while you mix the batter

1 cup whole wheat flour
1/2 cup rolled oats
2 tbsp brown sugar
1 tsp baking powder
1/4 tsp baking soda
1 cup milk
1 beaten egg
2 tbsp oil (I used canola, but you can use whatever you'd like. I would not recommend EVOO as it has a distinct flavour that will alter the pancakes)

Mix all ingredients together

For Berry Pancakes, mix in 1 cup of mixed berries. I used frozen berries that I had on hand, which I thawed in the fridge overnight.

For Asparagus pancakes, finely chop approximately 6 spears, and add that to the batter.

Each full recipe will make approximately 8-10 pancakes.

Once cool, put in a Ziploc and pop them in the freezer!

Enjoy!

Have a time saver recipe, coupon, trick or tip? Link up with us today!


January 30, 2012

Mompreneur Monday: The HopeFULL Company

I am absolutely thrilled about our Mompreneur team today!! They are a dynamic duo of moms, who are bringing a message of hope...and full bellies...into the world!

Meet Jessica and Stephanie, sisters and owners of the HopeFULL Company. They have created the cutest ways to help kids eat more whole foods with the idea of eat happily ever after.

What do you do?

We are both mothers to two young children and we're on a mission to help kids eat more whole foods!
Lately we've been busy launching our newest product, The BellyFULL Kit, which helps parents make nutritious and delicious frozen whole food pops at home with their kids.


How do you maximize your time as a busy mom running a business?

Get up before the kids do! It's not always easy getting up early, but those extra couple of hours before the kids get up really helps us get ahead.

What do you see as your greatest challenge being a MOMpreneur?

Finding balance is always a challenge. We love our work, so sometimes it's hard to turn off the computer or take a day off! We make a point to schedule time for ourselves, and we make quality time with our families a priority - time where we are present and enjoying the moment.

What advice do you have for other moms looking to start a business?

Be patient - it doesn't happen over night! We've also learned that just like parenthood, it takes a village. There are many wonderful resources out there for women entrepreneurs. Legal Corps, Women Venture, SCORE to name a few. Reach out, network and make connections. Most importantly, have fun and enjoy the ride!


Is there anything additional that you'd like to share?

We'd love to offer a BellyFULL Kit giveaway to one random new "liker" on our Facebook Page! Just head to https://www.facebook.com/thehopefullcompany, "like us" and post "Sweet Stella's sent me!" to qualify!

December 6, 2011

Talk-To-Me Tuesday: Carrot...Fries??

Yes, you read it right! Carrot FRIES!

My son absolutely adores Sweet Potato Fries, and would eat them all day long if they were offered.

So I figured...why not make fries out of another vegetable, say carrots?


They look just like sweet potato fries!

I julienned the carrots, then coated them with canola oil, corn meal, and some spices (I used nutmeg and ginger for these ones) and then baked them for 20 minutes at 425F.

Now..the verdict on these is still out. My son did not like them, but I will definitely try them again, but mix them with some sweet potatoes to maybe pull the wool over his eyes. I will also try them with oregano, basil and rosemary next time!

November 29, 2011

Talk-To-Me Tuesday: Carrot Pancakes

Lately, I've been wracking my brain about how to get more veggies into my son. He simply just will not eat them...unless they're sweet potato fries.

So...being creative, I wondered if he'd mind carrots grated into his pancakes. Boy oh boy! Did we have a winner here!!


  • 1
    cup all-purpose flour
  • 1
    tablespoon sugar
  • 2
    teaspoons baking powder
  • 1/4
    teaspoon salt
  • 1
    beaten egg
  • 1
    cup milk
  • 2
    tablespoons cooking oil
  • 3 large carrots, grated (about 1/2 to 3/4 cup)
Preheat skillet, griddle, frying pan...whatever your cooking method.

Combine dry ingredients in a bowl. Beat egg with milk and cooking oil, then stir into dry ingredients until combined and not lumpy. Make sure to not overmix.

Mix in carrots.

Cook on your griddle, turning when bubbles pop and don't fill back in.

Serve! I served mine plain, no syrup required!

Yield is about 8-10 pancakes, and they freeze really well in a Ziploc bag! To reheat, simply pop in the toaster!

October 25, 2011

Talk-To-Me Tuesday: Cheddar Rosemary Muffins

I had a surprise visit from my mom, Aunt and Grandmother last week so when I knew that they were on their way, I whipped up these beauties


Cheddar Rosemary Muffins

Preheat oven to 400F

1 3/4 c flour
1/3 c sugar
2 tsp baking powder
1/4 tsp salt
1/2 cup shredded cheddar cheese
1 egg
3/4 c milk
1/4 c oil

mix all of the dry ingredients, then add the cheese. stir to coat. add in rosemary to taste, then mix the wet ingredients in until moist

bake in muffin tin for 18mins then cool, or serve warm with butter!


My son LOVES them for breakfast and they do double duty...he's getting protein, dairy and grains, and the taste is out-of-this-world!

Enjoy!

Tip  Junkie handmade projects

October 18, 2011

Talk-To-Me Tuesday: Whole Wheat Pancakes

I made these yummy, and filling, pancakes last week for Owen and thought that I would share the recipe with you all today.

He absolutely loved them! The batch makes 8-12 medium sized pancakes, and they freeze really well in a Ziploc. Just defrost in the microwave, or throw in the toaster, and voila! Pancakes for breakfast, anytime!


Whole Wheat Pancakes

2 cups whole wheat flour
2 teaspoons baking powder
1 teaspoon salt
2 eggs, well beaten
2 cups milk
2 tablespoons vegetable oil

Stir together dry ingredients. Add eggs, milk, and oil. Stir
until dry ingredients are moistened (batter may be lumpy).
Cook on preheated griddle until bubbles form and edges start
to dry. Flip and cook until lightly browned.

I don't give Owen syrup just yet, so I've topped these with fruit (bananas or apples), peanut butter (that went over very well!) and strawberry-rhubarb jam!

Enjoy!

Tip  Junkie handmade projects

September 5, 2011

Talk-To-Me Tuesday: Hiding Veggies

So many mama friends of mine lately have been asking how I lucked out and got such a great eater. I think alot of it has to do with the variety that I exposed Owen to early on, and my sneakiness.

By that, I mean how I hide his veggies when he seems to be turning his nose up at them. The Hiding Veggies Project started about two weeks ago when he seemed to only want to eat carbs...and by that I mean homemade bread and buns, along with eggs and cheese. Pretty much everything else he would turn his nose up at.

Until this...


{Chicken, Broccoli and Cheese Omelette}


2 eggs
splash of milk
freshly ground pepper

Cook as an omelette and...

Fill with:
2tbsp cut grilled chicken
2tbsp steamed broccoli
2tbsp shredded cheddar cheese


And yes...he ate the entire thing!

Whenever you're having trouble getting fruits or veggies to your kiddo, it's usually time to pull a switch up. Create something new...an omelette, casserole, mix them with a favourite sauce (Owen especially enjoys veggies loaded into homemade pasta sauce)...heck! Even mix them into muffins! Carrot muffins, apple spice, cranberrry lemon! The possibilities are endless, and your kiddo may just develop a new favourite!

Have a project that you're working on? Why not share it with A Bowl Full of Lemons?!

August 15, 2011

Talk-To-Me Tuesday: Mama Szem's Pasta Sauce

So, you may recall a slight obsession that I have for making baby food. Well...it hasn't really stopped and I've been thinking of ways to keep making healthy and awesome foods for my son, but in ways that they are interesting, flavourful, and that can grow with him.

Today, I was asked to post my recipe for pasta sauce. Owen simply LOVES it and if we're ever struggling with him to eat something...we mix some of this in and he gobbles it up!

Mama Szem's Pasta Sauce

2 cans (28oz/796ml) crushed tomatoes

1 can (13oz/369ml) tomato paste

1/2 diced red onion

1 cup shredded carrot (about 2 carrots)

1 cup roasted garlic sweet potato (diced)

1 tbsp each dried oregano, dried basil, garlic powder

2 tsp fine black pepper

In large sauce pan, heat 2tbsp vegetable oil over medium heat. Add onion and saute until translucent, about 5 minutes.

Add other ingredients and turn to medium low. Stir occasionally and simmer for 20 minutes.

Divide into ice cube trays and freeze, then transfer into freezer bags. Use as a dip for veggie snacks, or over pasta and meatballs.


Yield: about 170 cubes!


I'm going to experiment with adding things like lentils (packed with fibre and protein!), quinoa, broccoli, spinach, asparagus and root vegetables in the winter. It's such a fantastic way to work in extra veggies for your kids, and you certainly could even use it on homemade pizza dough for a healthy alternative to pizza!

Another post for another day! Enjoy!

August 9, 2011

Talk-To-Me Tuesday: Going Green


I was recently asked how green my products are and if my processes are eco-friendly.

I am very happy to say that most of my materials themselves are eco-friendly; the journals that I use to created Jolie Journals are made from recycled materials...all of the cardstock and paper that is in my shop is acid free...all of my adhesives are non-toxic, some even washable!

This paper is actually 70% recycled!


The ink that I use is all acid free as well!

In terms of my processes, I try to reuse as much as possible. Since I purchase alot of things on Etsy (spreading the love!!), I reuse the shipping boxes that I get (along with diaper boxes and any other sturdy box around the house!), along with the bubble wrap and tissue.

The bubble wrap that I purchase is actually made from recycled materials too! How cool!!


The twine that I use from Nashville Wraps is made from recycled materials too!


And the cello bags that I use for packaging my paper products to protect them from water during shipping...they're recycled too!


It's pretty easy to find a way these days to fit some green into your business plan...and it feels pretty awesome too!

July 30, 2011

Special Post: Bellaroma Boutique

I have a secret obsession that I'd like to share with you all...a secret that will make you feel gloriously amazing, confident and wonderful...and smell divine.


About a month ago, I contacted Diana, the owner of Bellaroma {Natural Skincare Boutique} and fellow Artisan Group member about my skincare woes.

Since having my son (1 year ago) my skin has been on a roller coaster ride it seems. One day it's oily, the next it's itchy...then on another day it's totally fine and blemish free...only to be plagued with acne two days later.

Postpartum hormones have absolutely wrecked havoc on my skin, not to mention the wrinkles, lack of moisture, dark circles, bags and everything else that comes with being a first time mom.

So, off to Diana I went with my problem, and boy did she ever solve it! She recommended her lovely Yogurt & E Creamy Cleanser and Pomegranate Whipped Facial Creme.

I have never, ever ever been this happy with my skin...or my skincare products. First and foremost, the Yogurt & E Creamy Cleaner is so light that you barely feel like you're washing your face with more than just water. It feels fresh and squeaky clean afterward, and not dry like most other cleansers that I've tried. It is seriously lovely, and wonderfully divine...and what a great feeling to have nice firm, tight skin!


I follow up my little routine with the Pomegranate Whipped Facial Creme and let me just say one word: YUM! Oh my gosh! From the moment that I opened the jar, I knew that my skin was in for a really amazingly luxurious treat. From talking to Diana, I knew that a little dab was all that I would need, and massaging it into my skin was like...a heavenly experience. Instantly, my skin was tighter and I had to double take in the mirror...but those new-mom-dark-circles were fading right before my eyes!


I woke up feeling refreshed and wonderful...as if my skin care woes had disappeared overnight. Looking in the mirror, I knew that it wasn't a dream, but in fact they had disappeared. My skin is lovely, soft, blemish free and silky smooth. The wrinkles are fading, as are the dark circles and bags from under my eyes {perhaps because the routine of cleansing and moisturizing before bed with Bellaroma put my mind to ease and allowed me to sleep better?}

My wish list for Bellaroma is growing everyday! Knowing that my face feels and looks so amazing now, I can't help but lust after the Hawaiian Brown Sugar Body Polish, the Cucumber Peel Toning Butter {hello Post-Partum body changes!} and the Grapeseed Lavender Bella Bar. OH! And have you seen her brand new product, the Potted Honey Lip Butter? To. Die. For!

And as if it can get any better than feeling confident in your own skin, Diana is positively a dream to work with! She responds to requests right away, and her customer service is amazing. She truly cares about your concerns and worries, and seeks to put them to rest with her wonderful products, encouraging words and warm attitude.

I highly highly recommend that you check out her shop, and contact her if you have any questions about how she can help you look and feel your best! She truly is amazing, and her products are luxuriously wonderful!

July 19, 2011

Talk To Me Tuesday: Homemade Apple-Cinnamon Buns

I just realized that I haven't posted a recipe in a long while, and what better to post than a wholesome bread recipe that I guarentee you...your entire family will enjoy!

Apple Cinnamon {Whole Wheat} Buns

1/2 cup Applesauce mixed with 1/4 + 2 Tbsp cup Water
1 Large Egg
3 Tbsp Butter or Margarine (I use non-hydrogenated margarine in all of my bread recipes)
1/4 cup Chopped Apples (optional)
1 Tsp Salt
2 1/4 cups All-purpose Flour
1 cup Whole Wheat Flour
2 tsp Sugar mixed with 1 Tbsp Cinnamon
2 Tsp Quick Rise Yeast

*Please note that this recipe is for a bread maker...You absolutely could use it sans bread maker

Measure wet ingredients into bread pan first
Measure flour and cinnamon and sprinkle on top of the wet ingredients
Make a well in the flour and put in yeast

Choose Dough setting on your breadmaker (or mix well by hand for about 5 minutes). If dough is too dry, sprinkle water over the dough ball little by little. If it is too sticky, sprinkle flour.

If mixing by hand:

Knead dough for approximately 20 minutes, or until your hands are tired ;)
Let rise, covered and in a warm glass bowl, for 20 minutes
Punch down
Continue to let rise, covered, for 50 minutes

Take dough ball out of the breadmaker, and punch down on a lightly floured surface. Knead a few times to get excess air out of the dough.

Shape as desired. For these buns, I just ripped off pieces and formed them into 2" balls. you could, however, make them into butterhorns by rolling out the dough, cutting wedges and rolling point to wide end. Or, you could make them into swirls by ripping off pieces and rolling them into long tubular pieces, then swirling them around.

Place on a greased cookie sheet, and cover with a tea towel. Place in a warm spot to rise for 1 hour (I know it's a long time, but I promise it's worth the wait!)

Sprinkle tops with cinnamon sugar

Bake at 350F for 25 to 30 minutes


Buns can be frozen in a Ziploc bag, and are easily reheated in the microwave for a quick breakfast or snack on the go. I serve them now and then to my son with some applesauce for breakfast, and he LOVES them!

Happy Tuesday!

May 31, 2011

How-To Tuesday: Monster Meatballs

I was in search for a meatball recipe that was healthy, yummy, and wholesome for my son, and when I found a tonne of different variations, I decided to make one of my own!

He's had them about twice now and absolutely LOVES them!

Monster Meatballs

Preheat Oven to 400F

2lb lean ground bee1 cup oatmeal

1/2cup whole milk

1 1/2 tsp dried oregano

1 1/2 tsp dried basil

1 tsp onion powder

1 tsp garlic powder

1 tsp fine black pepper

1 egg

Line baking sheets with parchment paper

In a large bowl, combine oatmeal and whole milk. Toss in beef, herbs, spices and egg. Get your hands in there and mix everything together.

Roll meatballs so they are about the size of a rounded teaspoon

Place on cookie sheets, then bake for 12 minutes.

Let cool, then put in Ziploc baggies and put in freezer

Yield: 151 meatballs (or 50-73 portions {of 2-3 meatballs, cut into quarters after reheated})


And yes...they're yummy for adults too!

May 17, 2011

How-To Tuesday: Roasted Diced Parsnips

Happy Tuesday! I've been all over the place today - the post office and the grocery store primarily to gather goodies to bake and make yummy casseroles for a friend who had a baby yesterday! (more than a friend, she's like a little sister!!)

Anyhow! I made this last week, and my son really really loves it so I thought that I would share!

Roasted Diced Parsnips

Preheat oven to 375F

Peel and cut two large parsnips in half

Cut lengthwise, then dice into baby-bite sized pieces

Put in roasting pan with 1" of water

Add any spices that you'd like. Parsnips go well with ginger, cinnamon, nutmeg, basil, thyme, and garlic.

Cover and put in oven for approximately 30minutes, or until tender but not mushy.

Allow to cool, covered, so the pieces aren't piping hot when they got into the ice cube trays.

Divide into ice cube trays and freeze overnight, then transfer into Ziploc bags.

Yield: approx. 60 portions


Nutritional Information:

VITAMINS:

Vitamin A - 0 IU
Vitamin C - 20.3 mg
Niacin - 1.1 mg
Folate - 90 mcg
Thiamine - .12 mg
Pantothenic Acid - .9 mg
Vitamin K - 1.6 mg

MINERALS

Potassium - 573 mg
Sodium - 16 mg
Calcium - 58 mg
Phosphorus - 108 mg
Magnesium - 45 mg
Iron - .9 mg

The flavour is spectacular, and hopefully your kids will really enjoy them! I've been making them for my son sine he was 6months old (he's 11 months now!) and he loves the nutty flavour. They go great with apples and sweet potatoes, so try cooking them all together in a big roasting pan or roast them with squash and puree for a nice wintery meal!

May 2, 2011

How-To Tuesday: Roasted Beet Shapes

Happy Tuesday everyone!

Today's post is going to be pretty short and sweet, but is an awesome thing to do with your kiddos for a nutritious snack, and some fun finger foods for your toddler!

Roasted Beet Shapes

Preheat oven to 375F and line a cookie sheet with parchment paper

Step 1: Select medium sized beets. I bought a 2 lb bag of them at the grocery store, and used about 6 of them for this, then roasted and pureed the rest separately.

Step 2: Wash and peel the beets. You'll be thankful for an apron for this step! Beets stain...so...you're hands are going to be red red red when you're done!

Step 3: Slice beets about 1/8" thick

Step 4: Use small cookie cutters to cut the slices into shapes. Toss the excess beet pieces into a pot to roast or boil later on (no waste!)

Step 5: Drizzle shapes with olive oil. I also sprinkled them with garlic powder.

Step 6: Roast in the oven for about 10-20minutes, until soft (but not mushy)

Step 7: Allow to cool, and then toss in a Ziploc and into the freezer they go!


Nutritional information:

Vitamin A - 35 IU
Vitamin C - 3.6 mg
Niacin - .33 mg
Folate - 80 mcg
Pantothenic Acid - .14 mg
Vitamin B6 - .06 mg
Potassium - 305 mg
Sodium - 77 mg
Calcium - 16 mg
Phosphorus - 38 mg
Magnesium - 23 mg
Iron - .79 mg

Did you know? 2 medium beets contain 2 grams of fibre?! Great for constipated babies!

Reviews from my son have been nothing short of amazing! He loves his beet shapes (though the cookie cutters I used were a little large, so I dice up 3 shapes and he goes to town) and often they're the first thing gone from his tray these days.

Just a tip: unless you're down with poopy diapers, I don't recommend giving beets every day, or multiple times a day. You'll thank me later.

April 4, 2011

How-To Tuesday: Healthy Granola Bars

Good morning everyone! Well...YouTube is being incredibly slow lately, so How-To videos are on hold a bit. Today's How-To was going to take approximately 376 minutes to upload, and failed plenty of times to make me want to give up. However, the recipe is just TOO good not to share with you all! I made these granola bars two weeks ago before my crazy insane week with the 3tier cake began, and they were a lifesaver! For all of you busy moms, they make a perfect (and super healthy) breakfast or snack. For you moms with young children, they are perfect to get your kiddos to help in the kitchen! For moms with toddlers who are experienced with finger foods, chop them into sticks and they make a yummy and healthy snack (wait until 12mo+ though, as they have honey in them) Healthy Granola Bars Preheat oven to 350F Mash 3 ripe bananas in a large bowl Mix in: 2 cups trail mix (I used 1/2 cup coconut, 1 cup sunflower seeds, 1/2 toasted almonds. Use your favourites!) 2 cups rolled oats (or steel oats for added nutritional value!) 1 egg 2 tbsp honey (I used Clovermead...if you're in the SWOntario area, stop by! They're amazing!) Optional: 1/3 cup chocolate chips (I didn't put them in mine, but it'd be oh-so-yummy with them!) Mix everything together really well, then press into a 12x9 greased (or parchment lined) bar pan. Bake for 15-20 minutes or until edges are golden brown and crispy (I baked for about 25mins) Cool, and cut into bars! They're super tasty frozen, and make for a really great breakfast on the go! Try adding pumpkin seeds, soy nuts, sesame seeds or cranberries for added yumminess!

March 15, 2011

Sauteeing Onions for Baby Food

Who knew that sauteing onions could be so fun and informative?!


Onions make a great addition to beef, chicken, turkey and beef, and can be combined with other vegetables for a flavourful and super healthy Stiry Fry for baby!

Nutritional Information:
(per 1/4 cup)

Total Calories 15
Total Calories from fat 0
Carbs 3g
Dietary Fibre 1g
Protein 1g

For freezing, I put just a teaspoon of onions in each ice cube tray cavity, then put in a bit of water so that they would freeze solid. The water will also help soften the onions when you reheat in the microwave!
Happy sauteing!

February 21, 2011

How-To Tuesday: Roasted Carrot Puree, 3 Ways

We're back into the swing of things here, and that means that today is baby food day!

Roasted Carrot Puree, 3 ways


Roasted Carrots with Nutmeg and Cinnamon


Preheat oven to 375F

Peel and quarter 6 carrots

Put 1" water into roasting pan, along with carrots

Sprinkle carrots with 1/4 tsp nutmeg, and 1/4 tsp cinnamon

Bake for 45 minutes

Puree to desired consistency, then spoon into ice cube trays and freeze overnight. Transfer cubes into freezer safe bag for storage.


Roasted Carrots and Sweet Potatoes with Cinnamon


Peel and chop 1 sweet potato

Add a few handfuls of baby carrots to roasting pan

Add 1" of water to roasting pan

Sprinkle mixture with 1 tsp cinnamon

Bake for 45 minutes

Puree to desired consistency, then spoon into ice cube trays and freeze overnight. Transfer cubes into freezer safe bag for storage.


Roasted Carrots with Basil

Peel and quarter 6 carrots

Add 1" of water to roasting pan, along with the carrots

Add 1 tsp of dried basil (or fresh if you prefer)

Bake for 45 minutes

Puree to desired consistency, then spoon into ice cube trays and freeze overnight. Transfer to freezer safe bags for storage.


There you have it! Three ways to do baby food carrots!! So far, my son is in love with the Roasted Carrots with Nutmeg and Cinnamon. We're very excited to try the Roasted Carrots with Basil this week.

Not to mention, the house smells delish while the carrots are roasting!!


Related Posts Plugin for WordPress, Blogger...
Blogging tips