
Gosh...good afternoon!
Sorry I'm a little tardy with today's How-To, but I've been to the gym and grocery store, and finally have a few minutes to sit down and write.
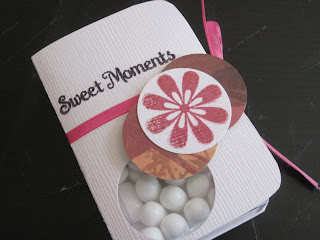
Cupid Kisses
Supplies:

one 4 1/4"x2" piece of cardstock (pink, red, white, purple...whichever you'd like!)
coordinating patterned paper
1" paper punch
1" paper punch
stamps
ink
pop dots
scrapbooking glue
double sided scrapbooking tape
paper trimmer
one container of Tic-Tac mints
one 6" piece of ribbon (pink, red, white, purple...whichever you'd like!)
Step 1:
Step 1:
Round the edges of the cardstock, and score a 1/2" spine in the centre of the cardstock

Steps 2 and 3:
Using the circle paper punch, punch a circle in the lower left hand corner of the front flap. Next, glue down your length of ribbon above the punched circle on your cardstock.

Step 4:
Stamp your sentiment above the ribbon

Step 5, 6 and 7:
Punch out three circles of coordinating paper, and one circle of the cardstock (you will also use the circle that was punched out of the front flap in this step). Stamp flowers/hearts/your choice of stamp on the cardstock circles.
For the front flap, layer two coordinating paper circles with a cardstock circle on top. Affix to the front flap using a pop dot.
For the Tic-Tacs, layer one cardstock circle on one coordinating paper circle. Cover the Tic-Tac label with a strip of coordinating paper, using scrapbooking glue to hold it in place. Glue the stamped image on the front of the Tic-Tacs. Attach the Tic-Tacs to the back flap with double sided scrapbooking tape.


Step 8:
Tie the ribbon and give to your Valentine!


Happy Valentine's Day!

2 comments:
Those are super cute!!!!
SO cute! What an awesome idea. Would make great favors for showers, too.
Post a Comment